Lighting
Alocasia grows well in bright, indirect light. Place the plant near a window with diffused sunlight. If the plant leans toward the light, rotate it regularly to ensure even growth. If your Alocasia does not get enough light, it will produce fewer leaves. The light requirements of Alocasia can be supplemented with artificial grow lights.
It is important to avoid direct sunlight, which can burn the delicate leaves of Alocasia. At the same time, too little light can slow growth and make the plants weak, limp, and unhealthy.
Temperature
Alocasia grows best at temperatures between 20 and 25°C (68 to 77°F). Do not allow temperatures to drop below 16°C (60°F). Exposure to temperatures below 16°C (60°F) can trigger a dormant period. Keep indoor Alocasia plants away from cold drafts, heating appliances, and air conditioners, which can cause sudden temperature fluctuations and dryness.
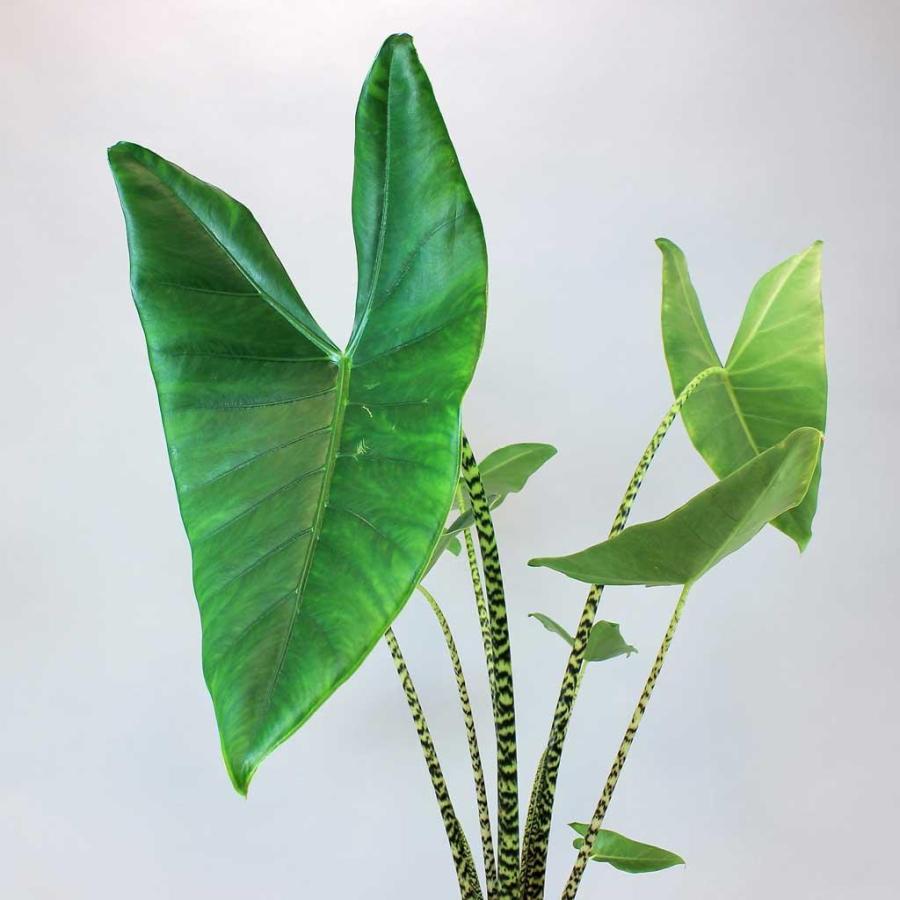
Watering and Humidity
Alocasia likes evenly moist soil but does not tolerate waterlogging. To avoid root rot, allow the top 2-3 cm of soil to dry out before watering. Use room-temperature water and ensure good drainage by using a well-draining soil mix. Water the plant until water begins to flow out of the drainage holes, and discard any excess water collected in the saucer. During warm months, watering may be needed more frequently, while in winter, as plant growth slows, the frequency of watering should be reduced.
Never allow water to accumulate at the bottom of pots or saucers, as your Alocasia will quickly rot and die if the soil mix remains waterlogged.
Alocasia thrives in high humidity of 60–80%, so regular misting of the leaves or placing the pot on a pebble tray filled with water will help increase humidity.
Soil
Alocasia prefers well-draining soil that retains moisture. Use a high-quality, well-aerated potting mix specifically designed for tropical plants. An airy soil mix will prevent water from stagnating around the roots and promote healthy growth.
Recipe for the ideal Alocasia soil mix:
– 2 parts peat-based potting soil
– ¼ part perlite
– 1 part orchid bark mix
Fertilizing
Feed your Alocasia with a balanced, water-soluble fertilizer formulated for houseplants. Dilute the fertilizer to half the recommended strength and apply it once a month during the growing season (from spring to early autumn). Avoid over-fertilizing, as this can lead to salt buildup and damage the plant. In winter, when growth slows, reduce feeding to once every two to three months.
Always follow the instructions on the fertilizer package for proper dilution and application.
Pruning
Pruning Alocasia is primarily done to remove dead, damaged, or yellowing leaves and stems.
Additionally, you can trim back leggy or overgrown shoots to give the plant a more compact and bushy appearance. Avoid cutting off more than one-third of the foliage at one time.
When pruning Alocasia, wear gloves to avoid potential skin irritation.
Repotting
Alocasia generally needs repotting only once every 1-2 years, or when the roots become too dense and you notice them growing out of the drainage holes. Repotting too often should be avoided, as it can cause serious stress and slow down the plant’s growth.
The best time for repotting is spring, during the active growing period. This allows the Alocasia to recover and adapt to its new location more quickly.
Choose a pot 3-5 cm larger in diameter than the current one and use a well-draining substrate.
Fill the pot halfway with potting mix for houseplants, carefully remove the Alocasia from its pot, and check for signs of root rot.
If the roots are severely compacted, gently loosen them and remove any visible rotting or damaged sections.
Place the Alocasia in the soil mix. Fill the space around the root ball with another layer of mix so that it is level with or slightly below the top edge of the pot.
Gently press the soil to remove air pockets, water your Alocasia well, and drain any excess water from the bottom of the pot or saucer (if used).
Propagating
The easiest way to propagate Alocasia is by separating and potting up the offsets (pups) that form in spring. These are new, small plants that sprout around the base of mature plants. Carefully cut them away with a knife, separating them from the mother plant while removing as many roots as possible, then transplant each plant into its own pot with loose, airy soil.
Alternatively, you can divide the fleshy rhizome in late spring or early summer and plant the divisions into pots. Keep them warm and in good light, and they will soon produce new shoots.

Additional Care
Alocasia prefers stable growing conditions and can become stressed by sudden environmental changes. Stressed plants are more susceptible to spider mites, other pests, or diseases.
If your Alocasia goes dormant during the cool months, the leaves may die back. Allow them to die back completely before cutting them off, because the plant extracts nutrients from the leaves and transfers them to the roots to transition into dormancy. Pruning dead leaves too early can negatively affect future growth.
If your Alocasia goes dormant in winter, reduce watering and keep the soil mix on the drier side.
Toxicity
Alocasias are toxic to pets and humans if ingested. Keep out of reach of pets and children.
When working with Alocasias, it is best to wear gloves, as the sap can cause skin irritation.
Pests and Diseases
Alocasias are vulnerable to pests under stressful conditions, especially:
– Spider mites
– Mealybugs
– Scale insects
Regularly check the base of the stems and the undersides of leaves for these pests.
Spider mites are attracted to dry conditions with low humidity. These tiny pests feed on plant sap, causing yellowing leaves, webbing, and a “dusty” appearance on the underside of leaves. Dry indoor air, common during cool weather or in air-conditioned spaces, increases their presence. To prevent infestation, increase the humidity around your Alocasias.
Mealybugs appear on plants under stress, often due to overwatering, poor air circulation, high humidity, or lack of light. These pests form fluffy white clusters along stems and leaf joints, sucking sap and weakening the plant. Mealybugs prefer warm, humid conditions, often found when plants are kept in poorly lit, warm, humid spaces. To combat them, provide a bright location with good air circulation and avoid overwatering your Alocasia.
Scale insects, which appear as hard bumps on stems and the undersides of leaves, thrive in stagnant air and low light. Like mealybugs, they feed on sap and can cause stunted growth, discoloration, and leaf drop. Regularly cleaning the plant’s leaves and ensuring good air circulation will help you detect and prevent scale infestations.
If you detect pests, it is recommended to carry out three treatments with insectoacaricides at intervals of 7-10 days and change the growing conditions.
Frequently Asked Questions
Why are the leaves of my Alocasia turning yellow?
There are many reasons why Alocasia leaves turn yellow. The most common cause is overwatering, although other causes include lack of light, low humidity, insufficient warmth, poor soil, or nutrient deficiencies. Older leaves naturally turn yellow and die off as new leaves appear.
Do I need to mist my Alocasia with water?
To increase humidity and keep the leaves clean, the foliage can be misted once or twice a week. Excessive misting can lead to fungal diseases. Mist in the morning so the plants have time to dry out during the day.
What does an overwatered Alocasia look like?
Excess water can lead to drooping leaves, brown spots, yellowing, or softening. Other signs of overwatering include mold, root rot, pests such as fungus gnats, powdery mildew, or fungus on the leaves or soil.
What type of pot should I choose for Alocasia?
Unglazed clay pots, such as terracotta, are ideal for growing Alocasia.
This material has a remarkable ability to regulate soil moisture by wicking away excess moisture from the plant roots, preventing root diseases. Unglazed clay is also highly breathable, providing better soil aeration, which is important for the active and healthy growth of your Alocasia.